Installing Drywall in Your Bathroom: A Homeowner Guide
Learn how to plan bathroom drywall work, choose the right board for walls and ceilings, and know when moisture damage needs professional repair.
.webp)
For installing drywall in your bathroom, success involves more than hanging drywall sheets and covering seams. Because this moisture-prone room needs extra care, choose the right bathroom drywall, maintain sound ventilation, and check early for hidden water damage or mold. Around a shower, secure sheets with drywall screws and reinforce every corner. Then use drywall compound, a drywall knife, drywall mud, paper, and careful sanding to create a smooth surface. Every screw and layer of mud affects the final result. Whether you are gathering tools for a DIY project or hire a contractor, this guide covers choosing the right drywall, handling mud, and proper drywall mud application for a polished, paint-ready finish that protects your home over time.
⚡ Key takeaways
- Fix leaks, remove damp materials, and confirm exhaust ventilation before covering walls.
- Use moisture-resistant drywall for humid areas; install cement board or waterproof backer in shower zones.
- Hang ceilings first, stagger joints, and avoid seams at door or window corners.
- Use corrosion-resistant screws; set them slightly below the surface without tearing paper.
- Apply thin, wider coats of compound, sand lightly, then use bathroom-rated primer and paint.
- Run the exhaust fan during showers and at least 20 minutes afterward to control moisture.
Bathroom drywall installation starts with stopping moisture problems and selecting the right material: standard or moisture-resistant board for dry areas, and approved tile backer with waterproofing in wet zones. Plan seams carefully, use corrosion-resistant screws, and finish with thin, feathered coats of compound. Durable primer, bathroom-rated paint, and properly vented exhaust fans help prevent future damage; recurring leaks or mold warrant professional assessment.
Before Installing Drywall in Your Bathroom: Inspect Moisture and Choose the Right Board
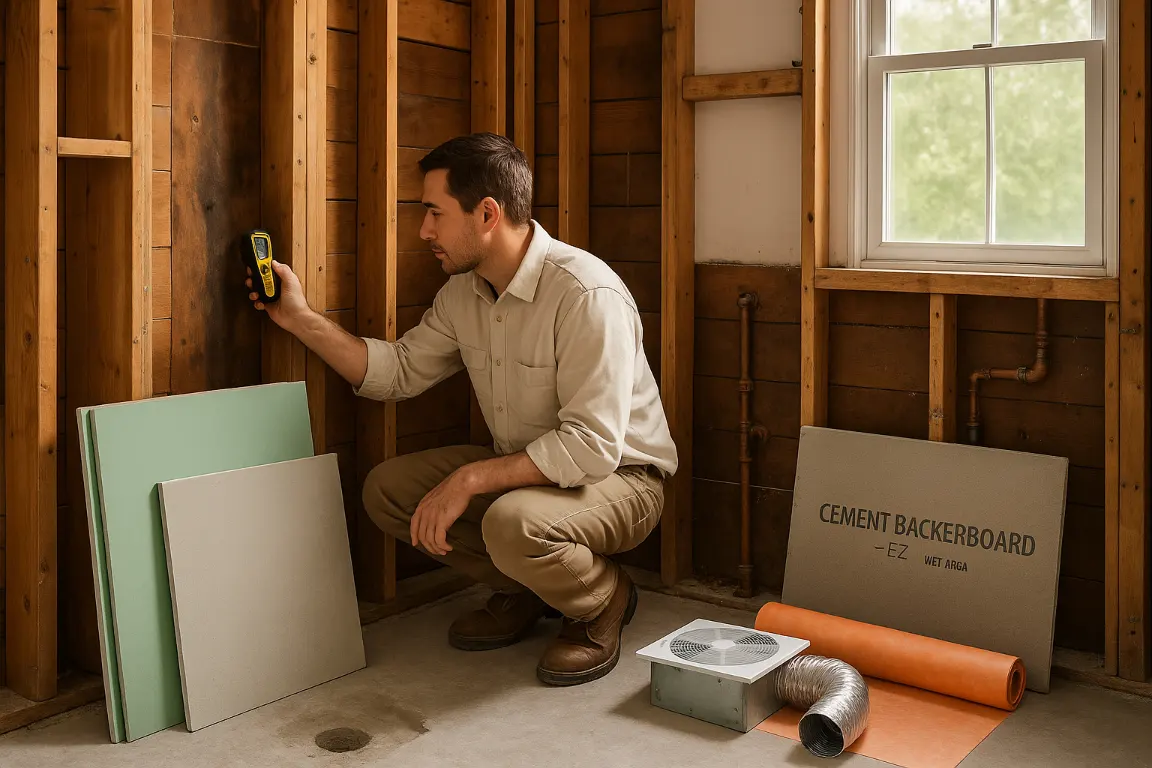
Installing drywall in your bathroom should start well before the first panel reaches the wall. A bathroom is a compact room exposed to humidity, splashing, plumbing leaks, and trapped condensation. Over time, moisture can quietly damage framing around the shower, tub, vanity, exterior walls, and every corner in between. Before installing bathroom drywall, inspect the wall cavity for staining, softened wood, corroded fasteners, musty odors, failed caulk, peeling paper, and signs of mold. Repair the source first. Then allow enough time for the area to dry completely, and confirm the exhaust fan is properly sized and vented. New drywall sheets can create a finished look, but they cannot solve an active issue behind the wall.
Choosing the right material matters just as much. Standard drywall works well in many areas of a well-ventilated bathroom. Moisture-resistant gypsum board is a reliable choice for walls and ceilings exposed to routine humidity. In direct wet zones, including a shower surround, cement board or another approved tile backer is essential. Never rely on “green board” alone where tile receives regular water; the assembly needs a complete waterproofing strategy. The right tools, including a drywall knife, plus quality drywall screws, drywall compound, and drywall mud, help support proper drywall mud application and a smoother finish before sanding. At MrWalls Drywall & Painting, we assess the surrounding home, including adjacent rooms, ventilation, and the condition of existing sheets, before recommending a repair or replacement scope. This careful process helps prevent recurring damage and ensures every screw, seam, and finished surface delivers the durable, clean-lined result your bathroom deserves.
Bathroom Wall Board Selection by Location
| Bathroom area | Recommended board or backer | Why it fits | Important installation note |
|---|---|---|---|
| General walls in a well-ventilated bathroom | Standard drywall | Suitable for many bathroom areas when moisture exposure is limited and ventilation is adequate. | Inspect for leaks or past dampness before installation and confirm the exhaust fan is properly sized and vented. |
| Walls and ceilings exposed to routine humidity | Moisture-resistant gypsum board | Provides a practical option for surfaces regularly exposed to humidity and condensation. | Address active moisture sources, dry the area thoroughly, and repair failed caulk or plumbing leaks first. |
| Direct wet areas, including shower surrounds and tub surrounds | Cement board or another approved tile backer | Designed for locations that receive regular direct water exposure behind tile. | Use a proper waterproofing strategy; do not rely on green board alone where tile faces regular water. |
Bathroom Drywall Preparation Checklist
- Inspect framing and wall cavities for stains, softened wood, rusted fasteners, musty odors, or visible mold.
- Find and repair plumbing leaks, failed caulk, roof issues, or condensation sources before installing any new board.
- Dry affected materials completely; covering damp framing can trap moisture and lead to recurring damage.
- Confirm the bathroom exhaust fan vents outdoors and is adequately sized for the room’s humidity level.
- Use standard drywall only in dry, well-ventilated bathroom areas with limited moisture exposure.
- Select moisture-resistant gypsum board for walls and ceilings exposed to everyday bathroom humidity.
- Install cement board or an approved tile backer in shower surrounds, tub walls, and other direct wet zones.
- Use a complete waterproofing system behind tile; moisture-resistant board alone does not stop regular water exposure.
Bathroom Drywall Layout and Installation: Sheets, Screws and Mud
Bathroom drywall needs to do more than create a smooth surface for paint. In a moisture-prone room, careful planning helps reduce vulnerable seams, protects the paper face, and supports a durable finish. At MrWalls Drywall & Painting, we assess framing straightness, blocking, plumbing access, moisture intrusion, and signs of mold before installing drywall. Correcting a bowed stud or adding backing at a seam takes little time now and can help protect your home from ridges, cracks, and soft spots later.
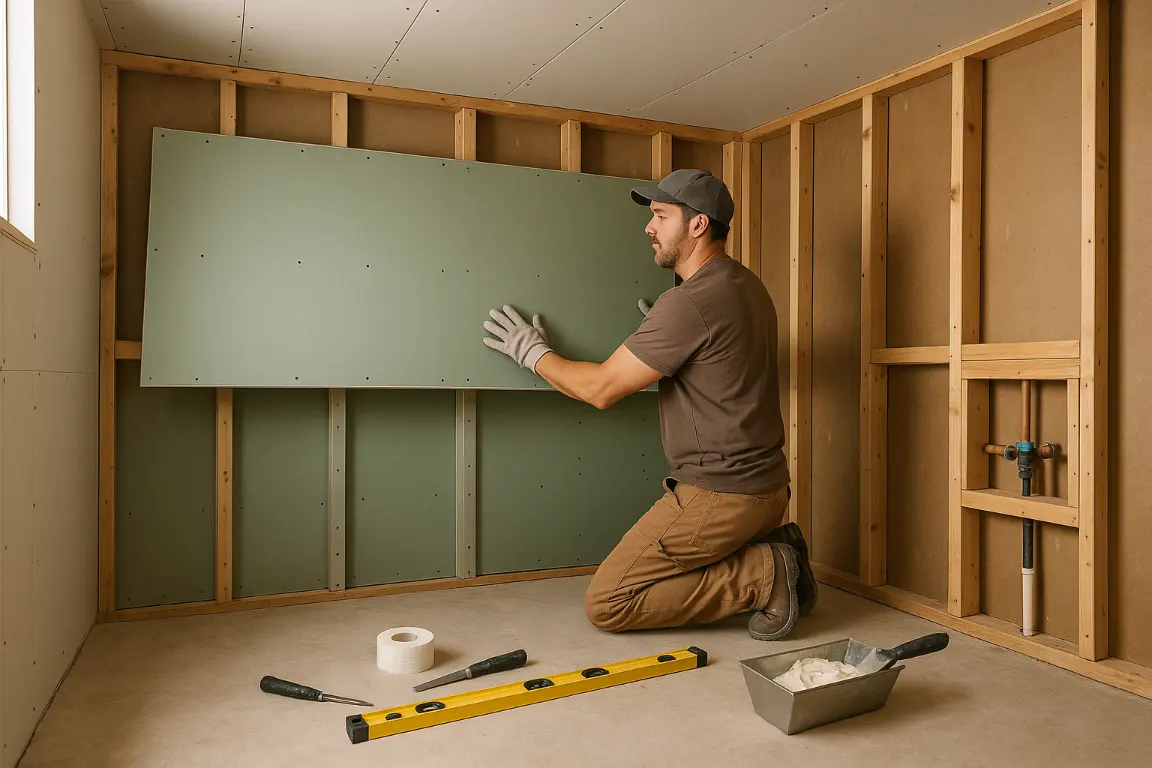
Smart drywall sheets placement gives the finished bathroom a cleaner look and stronger performance. When possible, arrange sheets so factory edges meet and butt joints are limited. Hang ceiling sheets first. Then install wall sheets horizontally when the layout allows, reducing long vertical seams for a more unified finish. Stagger joints between courses, and avoid placing a seam at the edge of a door or window opening, where movement can cause cracking. Each inside corner also needs solid framing or added blocking so both sheets can be fastened securely.
In standard bathroom areas outside the tub or shower surround, moisture-resistant drywall may be appropriate, depending on local requirements and the planned finish. Shower walls need a proper tile backer or approved waterproof assembly, not ordinary drywall. The same approach applies when installing drywall in your bathroom after water damage: resolve the source, remove damp materials, and address mold before new board is installed.
Use corrosion-resistant drywall screws in the right length for the framing. Set each screw just below the surface without breaking the facing paper. A screw driven too deeply loses holding power, while proud heads can show through the finish. Once the board is secure, tape seams and apply drywall compound or drywall mud in thin, progressively wider coats. Proper drywall mud application relies on capable tools, including a quality drywall knife, careful sanding, and adequate drying time between coats. Rushed mud work often leads to flashing, uneven joints, or visible screw patterns after paint.
Bathroom Drywall Installation Checklist
- Inspect framing for straightness, blocking, plumbing access, and moisture damage before hanging any sheets.
- Install ceiling drywall first, then hang wall sheets horizontally where the room layout permits.
- Use factory edges together, stagger joints, and keep seams away from door and window corners.
- Add solid backing at inside corners and every unsupported seam for secure fastening.
- Choose moisture-resistant drywall for standard bathroom areas; use approved backer and waterproofing inside showers.
- Drive corrosion-resistant screws slightly below the surface without breaking the paper face.
- Tape seams, apply thin widening mud coats, and allow complete drying before sanding or painting.
Finish Bathroom Drywall: Proper Drywall Mud Application, Paint and Ventilation
A polished bathroom comes down to the finishing details. After repairs are secure and the drywall is dry, proper drywall mud application creates the smooth, durable surface premium paint requires. Whether you are installing drywall or completing a repair while installing drywall in your bathroom, start with sound drywall sheets, properly set drywall screws, and the right tools nearby.
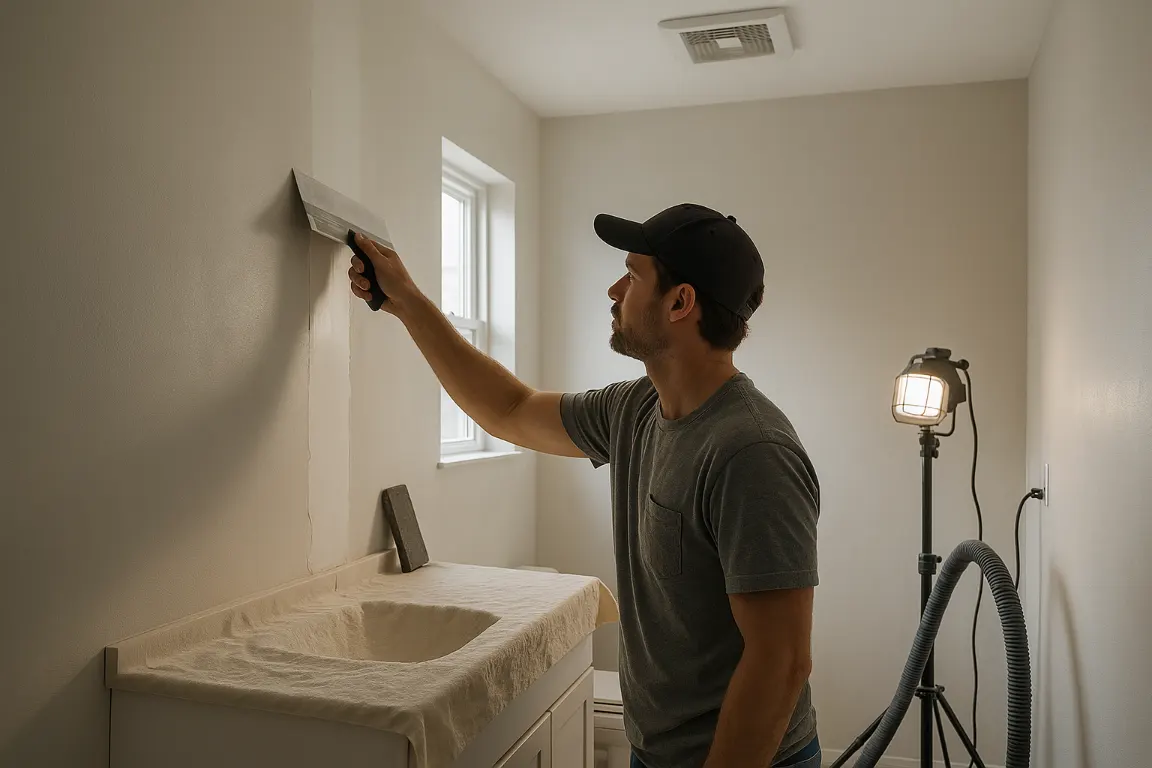
Apply drywall compound in thin, even coats. Avoid trying to hide joints, fasteners, a single screw, or patched areas in one pass. Each coat of drywall mud should extend slightly wider than the last. Feather the edges with a clean drywall knife until they blend into the surrounding wall. Keep the room clean as you work. Even a small piece of dried mud can create a ridge that becomes visible beneath a vanity light or glossy paint.
Give paper tape extra attention at every seam and corner. The paper should lie flat and stay fully embedded in compound, with no bubbles, loose edges, or heavy buildup. Once the mud has dried, use a fine grit sanding sponge to smooth the surface rather than reshape it. A fine-grit sanding sponge and a light touch work best.
Check the bathroom drywall from the side with a work light to spot shallow depressions or raised edges. Vacuum thoroughly before priming. Then choose a quality bathroom-rated primer and paint made to handle moisture. Even excellent drywall work can suffer when humid air remains after a shower. Run a properly sized, vented exhaust fan during bathing and for at least 10 minutes afterward. It should move damp air outside, not into an attic or ceiling cavity. In an older home, peeling paint, stains, soft drywall, or mold may point to a ventilation issue, a plumbing leak, or earlier water damage, not simply a coating problem.
MrWalls Drywall & Painting approaches every bathroom as a complete system: sound repairs, carefully blended compound, crisp sanding, durable coatings, and practical guidance that protects the walls long after the crew leaves.
Bathroom Drywall FAQs and When to Hire a Contractor
Bathroom drywall raises practical questions because this room faces more moisture than almost any other space in the home. Steam, splashing water, limited ventilation, and plumbing leaks can send moisture behind paint and into wall cavities. In a well-designed bathroom, standard drywall may work well on ceilings and walls away from the shower. Moisture-resistant board, cement board, or another approved backer material is better suited to areas with direct exposure. The right choice depends on the room layout, ventilation, and the location of tubs, sinks, and shower surrounds.
Many homeowners ask whether green board prevents mold. Moisture-resistant drywall can slow water absorption, but it is not waterproof. It cannot solve an active leak, poor exhaust ventilation, or failed shower caulking. Mold needs moisture and an organic food source. Drywall that stays damp after a plumbing issue or recurring condensation can support growth, even beneath intact paint. Soft spots, bubbling paint, stains, a musty odor, or crumbling gypsum call for investigation, not just a fresh coat of paint.
Small cosmetic issues, such as a nail pop, minor dent, isolated seam crack, or damaged corner, can often be repaired without replacing a full wall. For homeowners installing drywall in your bathroom, careful material selection and finishing make a difference. Drywall sheets should be secured with drywall screws, with each screw set at the proper depth. Joints should be finished with drywall compound, drywall mud, paper tape, a drywall knife, and careful sanding. Proper drywall mud application takes time, the right tools, and a light hand. Too much mud can leave ridges, while poorly aligned sheets can create vulnerable seams. Damage near fixtures deserves closer attention, particularly when water has traveled from a shower into an adjoining room.
MrWalls Drywall & Painting helps homeowners determine whether they need a simple repair or a closer look at a moisture concern. If drywall has been saturated, tile is loose, mold is suspected, or a leak keeps returning, a qualified contractor can locate the source, inspect framing and insulation, remove compromised material cleanly, and rebuild with the right board and finishing system. Proper drywall repair is about more than a smooth surface. It helps ensure your bathroom is dry, sound, and ready to perform for years.
Frequently asked questions
What type of drywall should be used in a bathroom?
Standard drywall can work on walls and ceilings away from direct water in a well-ventilated bathroom. Moisture-resistant drywall is often a better choice for humid areas, while shower and tub surrounds need cement board or an approved tile backer with a proper waterproofing system.
Can green board be used behind shower tile?
No. Green board resists humidity but is not waterproof and should not be relied on behind tile exposed to regular shower water. Use a suitable cementitious backer board or approved waterproof tile assembly instead.
Should I replace drywall after a bathroom leak?
It depends on the extent of the water exposure. Drywall that is soft, swollen, stained, crumbling, moldy, or repeatedly damp should be removed after the leak is repaired. Small dry, cosmetic stains may only need repair, primer, and paint after the area is inspected.
How long should a bathroom exhaust fan run after a shower?
Run the fan during the shower and for at least 20 minutes afterward. It should vent outdoors, not into an attic or ceiling cavity, to help remove humidity that can lead to peeling paint, mold, and drywall damage.
Why are drywall seams or screw heads visible after painting?
Visible seams, flashing, and screw patterns usually result from rushed mud work, uneven sanding, insufficient drying time, or screws set too deep or left proud. Thin, progressively wider coats of compound, careful sanding, and quality primer help create a smooth finish.
When should I hire a bathroom drywall contractor?
Hire a professional for recurring moisture, suspected mold, soft drywall, loose tile, plumbing leaks, extensive water damage, or repairs near a shower surround. A contractor can identify the moisture source, inspect framing and insulation, and rebuild the wall with appropriate materials.