Drywall Installation Guide for Springfield Homeowners. Plan a safer drywall installation project with practical steps, material guidance, and advice on when to call a Springfield contractor.
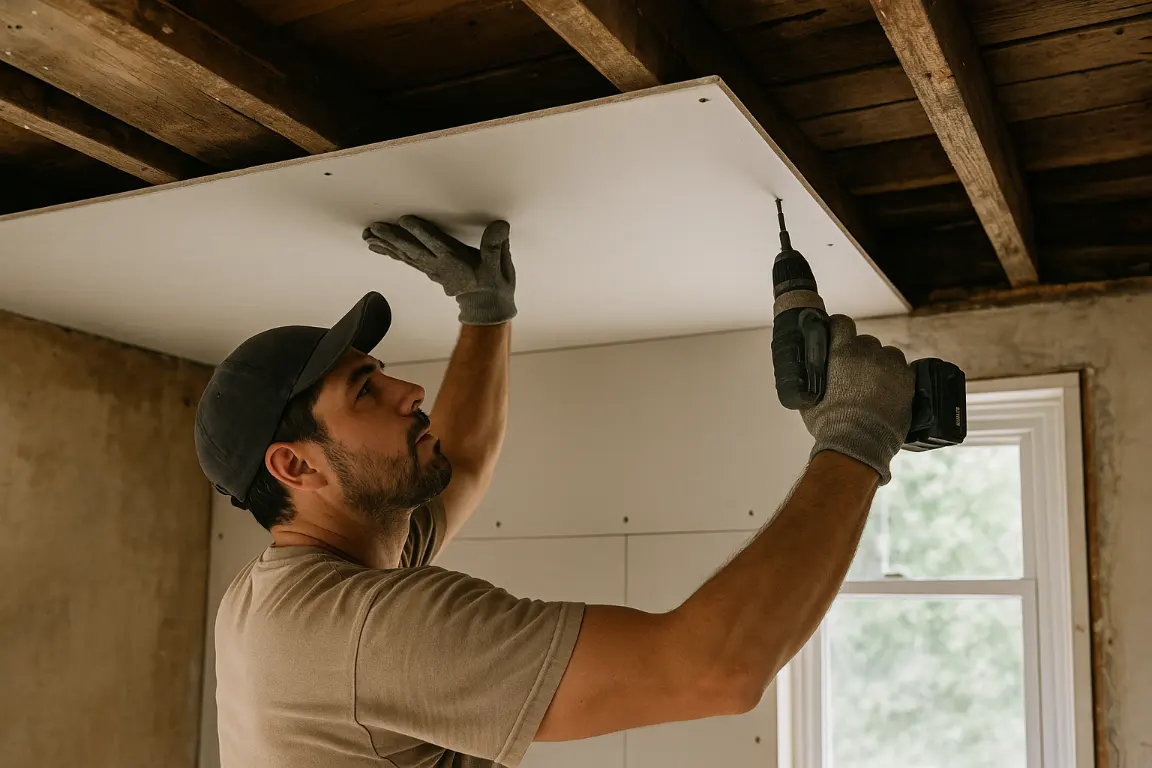
Drywall installation can renew a damaged room, complete a basement, or lend a remodel its finished character. The right approach depends on the space, the framing, and your confidence with measuring, lifting, cutting, and finishing seams. Springfield homeowners can often manage a diy repair or a straightforward wall, while ceilings, expansive rooms, and moisture-prone areas are often best handled by a seasoned professional.
Before purchasing gypsum board, drywall sheets, or other products, or scheduling a contractor, define the scope with care. Consider each drywall panel and board, the floor-to-ceiling measurements, every corner, and the building conditions behind the wall. The proper tools, tape, drywall screws, and screws bring greater precision to every step, whether you plan to hang drywall, install drywall, or oversee hanging drywall. A clean cut, patient taping, and thoughtful drywall finishing help prevent damage and create a polished finish; even a small bit of preparation matters when you mud drywall or fit a panel at home.
Springfield homeowners can achieve durable, paint-ready drywall by assessing framing, moisture, utilities, and finish requirements before work begins. Careful measurement, material selection, floor protection, and seam planning help prevent waste and cracking. While small patches may suit DIY work, larger repairs, water damage, and ceiling installation often benefit from professional preparation, dust control, safe lifting, and experienced finishing.
A polished drywall installation begins well before the first drywall panel is lifted into place. In any home or commercial building, the visible finish reveals only part of the work: framing, insulation, electrical runs, plumbing, and the condition of existing walls and ceilings all influence the path ahead. A careful assessment protects the schedule, helps prevent damage, and reduces expensive corrections once work has begun.
Start by defining the setting. Are you managing new construction, replacing damaged drywall, remodeling a single room, or restoring a water-affected area? Each scenario demands a different strategy. New walls may require exact measurements, blocking, vapor planning, and the appropriate gypsum board products. A repair may reveal moisture, compromised studs, or staining that should be addressed before a new panel is installed. Ceiling work brings its own considerations, especially where textured or popcorn finishes call for controlled removal and a refined final surface.
Measure every surface precisely, accounting for windows, doors, soffits, closets, angled ceilings, and each corner. Before you hang drywall or install drywall, study the floor plan, identify where drywall sheets need to be cut, and verify that the correct board thickness, drywall screws, screws, tape, taping materials, and tools, including the proper drill bit, are ready. This essential step also helps determine whether diy work is practical or whether experienced hanging drywall and drywall finishing support will produce the stronger result. Note:
When damage is unclear or multiple trades are involved, a professional assessment delivers lasting value. MrWalls Drywall & Painting helps homeowners evaluate gypsum conditions, plan each drywall panel, mud drywall with precision, and guide the project from framing through final paint for a clean, durable finish.
A diy approach can suit a small, straightforward patch in a low-traffic room, particularly when the essential tools are already on hand and there is time to work with patience. Still, drywall installation involves considerably more than simply hanging a drywall panel. To hang drywall well, each drywall panel and gypsum board section must be measured, supported, and aligned with precision. Clean cuts around outlets, a crisp corner, properly set drywall screws, and solid backing at every edge help prevent damage, cracking, and waviness as the building settles. Successful hanging drywall depends as much on preparation as on the final placement of each panel.
The finish is where many first-time projects lose their refinement. Whether working with drywall sheets or a single board, taping seams, applying tape, learning to mud drywall, sanding, and feathering each transition is a skill developed one deliberate step at a time. Drywall finishing also calls for the right products, a steady hand, and a trained eye: even a subtle ridge, screw dimple, or uneven texture can stand out when Springfield’s shifting daylight moves across a freshly painted wall. Dust control matters, too, especially in a furnished home or any room connected to active living spaces. A drill bit, a clean cut, and the right screws make the work more manageable; they do not replace thoughtful preparation.
For a single small repair, learning to install drywall can be a rewarding project. For water-damaged walls, ceiling repairs, larger remodels, or surfaces that must blend seamlessly into an existing finish, a qualified local contractor is typically the more efficient choice. MrWalls Drywall & Painting brings the equipment, preparation standards, and finishing experience to identify underlying issues and deliver a smooth, paint-ready result from floor to ceiling. The objective is not merely to cover damaged gypsum; it is to make the repaired area disappear into the room.
A beautifully refined wall or ceiling is decided long before the first cut. MrWalls Drywall & Painting approaches every gypsum board project with exact dimensions, carefully selected products and professional-grade tools, aligning each board, drywall panel and drywall sheets choice with the room, floor conditions and building requirements. From panel size and thickness to the placement of drywall screws at every corner, each step strengthens the drywall installation and helps prevent damage. Whether a project requires diy guidance to hang drywall, skilled hanging drywall, or a complete service to install drywall, mud drywall, tape and finish taping, considered preparation establishes a dependable surface for drywall finishing. The result is a seamless finish, cleaner lines, fewer screws adjustments and a more polished home, proof that even a small bit of planning makes a lasting difference.
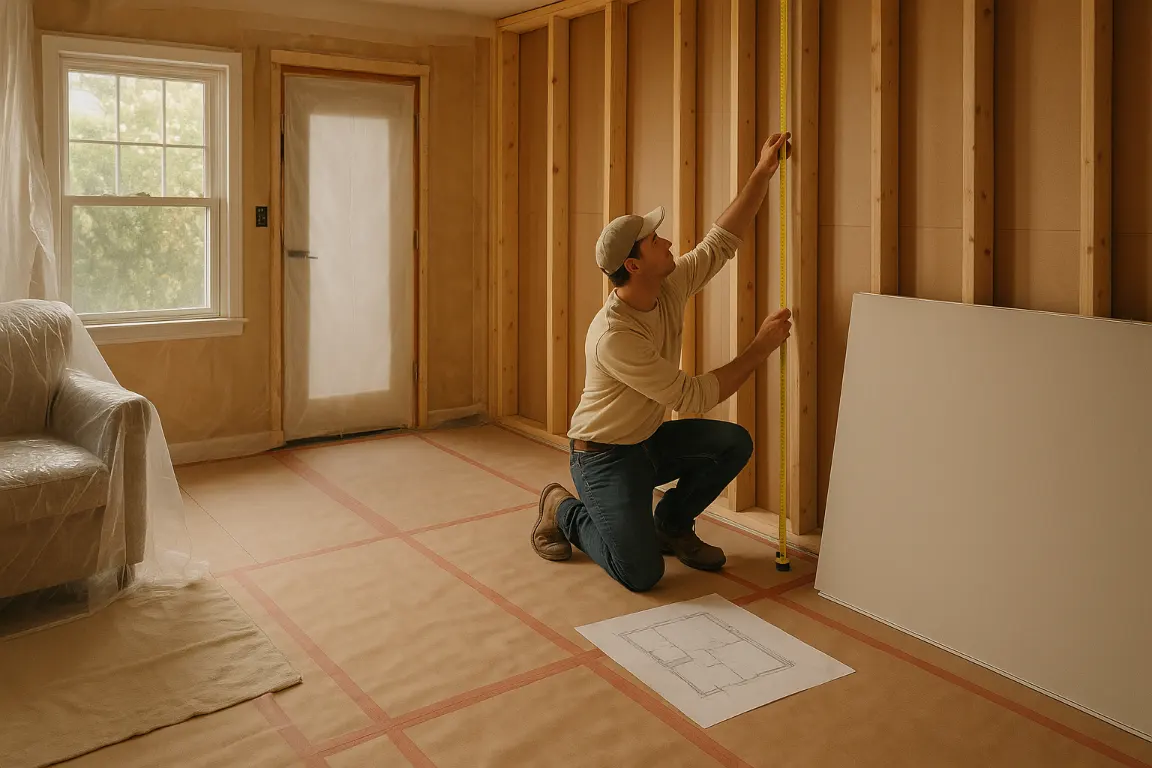
Start by measuring the length and height of every wall in the room, then calculate the ceiling separately if it is included in the project. Note windows, doors, bulkheads, angled ceilings, and every corner or opening, allowing for offcuts as you estimate drywall sheets. A standard drywall panel covers considerable area, yet a room with tight returns, intricate cuts, or repeated corners often demands more material than square footage suggests. Confirm whether your building requires standard gypsum board or a specialty board, then order a modest surplus so the drywall installation can continue without interruption.
As the next step, sketch a simple layout showing where each panel will land and where seams will fall. When hanging drywall, run sheets perpendicular to framing where appropriate, and never place a joint over a door or window corner. This is how experienced installers hang drywall efficiently, reduce waste, and prevent damage at vulnerable points. Assemble the tools before work begins: a dependable cut knife, tape measure, straightedge, drywall screws, screws, and the correct driver bit. Careful planning gives every drywall installation a more refined finish and makes later taping, mud drywall work, and drywall finishing markedly easier.
Before materials arrive, clear the work area and protect the floor with rosin paper, drop cloths, or durable surface-protection products secured cleanly at the edges. Remove or cover furniture, seal nearby openings against dust, and maintain a clear route for carrying gypsum panels through the home. Whether this is a diy refresh or a larger install drywall project, thoughtful preparation safeguards the space, streamlines cleanup, and lets the final tape and finish work proceed with confidence.
Not all drywall is made for the same conditions. The right gypsum board depends on where it will be installed, how the room is used, and the level of protection the assembly must provide. From standard drywall sheets for a finished home to moisture-resistant products for baths and laundry areas, MrWalls Drywall & Painting helps homeowners select the right drywall panel, board, and panel for every application. Our local experts understand every step of drywall installation, from hanging drywall and selecting drywall screws, screws, tape, tools, and the right bit to drywall finishing, taping, and a polished finish. Whether you plan to hang drywall, install drywall, cut gypsum, mud drywall, or repair a corner near the floor, the right building materials and diy guidance can help prevent damage and create a refined result.
Standard gypsum board is a reliable choice for dry interior walls and ceilings, from bedrooms and living areas to hallways and many finished basements. For a refined drywall installation, choose drywall sheets suited to the space, pair them with the proper drywall screws and tools, and confirm that every drywall panel is securely supported before drywall finishing begins. In bathrooms, laundry rooms, kitchens, and below-grade areas, moisture-resistant board offers a better-facing and core construction for humid conditions. It adds a valuable measure of protection, though it cannot replace leak repair, effective ventilation, or properly waterproofed showers.
Fire-rated gypsum board is often necessary when local building codes require a rated assembly, such as the separation between an attached garage and a home or around designated utility areas. Its reinforced core helps a wall or ceiling resist fire for a prescribed period when compatible products are selected and installation follows the required step-by-step details. Whether you hang drywall yourself or hire a professional, precise cuts, firmly set screws, and neatly taped joints all support a durable, dependable finish.
For media rooms, home offices, bedrooms, and shared walls, sound-control options can temper the transfer of everyday noise. Denser panel products, insulation, resilient channels, and careful sealing work in concert to create a quieter room. Planning matters at every corner, floor transition, and opening: measure before you cut, use the correct bit for fasteners, and apply tape and mud drywall with care during taping. Choosing the right gypsum board from the outset helps prevent damage, limits costly rework, and delivers a finish designed for real-world demands, whether the project is diy, hanging drywall, or a full professional install drywall service.
| Board option | Best suited for | Primary benefit | Important limitation or installation note |
|---|---|---|---|
| Standard gypsum board | Dry interior walls and ceilings, including bedrooms, living areas, hallways, and many finished basements | Dependable wall and ceiling finish for typical dry rooms | Best used where moisture is not a regular concern |
| Moisture-resistant board | Bathrooms, laundry rooms, kitchens, and below-grade spaces | Provides a more suitable facing and core for humid conditions | Does not replace leak repairs, ventilation control, or proper shower waterproofing |
| Fire-rated gypsum board | Areas requiring a rated assembly, such as between an attached garage and a home or around certain utility areas | Reinforced core helps the assembly resist fire for a prescribed period | Must be installed correctly with compatible materials and in accordance with local building requirements |
| Sound-control options | Media rooms, home offices, bedrooms, and shared walls | Can reduce transfer of everyday noise | Best results often require denser panels, insulation, resilient channels, and careful sealing together |
Before new drywall goes up, the framing and surrounding work area deserve a disciplined inspection. This essential step enables a skilled crew to prevent damage that could otherwise remain hidden behind a finished wall or ceiling. MrWalls Drywall & Painting assesses studs, blocking, fastening surfaces, and each board for moisture staining, warping, loose connections, protruding drywall screws, and uneven planes. In water-damaged areas, every board and gypsum board surface must be completely dry and structurally sound before repairs begin; closing in damp framing can invite recurring stains, odors, and deterioration within the building.
The room is protected with the same level of care. The floor receives appropriate drop protection, furnishings are moved or shielded, and doorways may be sealed to contain demolition dust. Particular attention is paid to every corner, where trim, baseboards, adjacent finishes, and outside drywall edges are especially vulnerable to impact. Electrical boxes, plumbing penetrations, and HVAC openings are identified before any cut is made, a bit is selected, or screws are driven. The right tools, products, and preparation set professional drywall installation apart from a rushed diy approach.
Thorough preparation creates a cleaner, more precise installation. It gives every drywall panel and gypsum surface a stable foundation, helps drywall sheets align cleanly from panel to panel, and reduces the risk of cracks caused by unsupported edges or shifting framing. Whether the work involves hanging drywall, a focused repair, drywall finishing, taping, tape application, or popcorn ceiling removal, the process begins well before crews hang drywall or mud drywall. Protecting the site first preserves the parts of the home not being renovated and supports a lasting finish when it is time to install drywall.
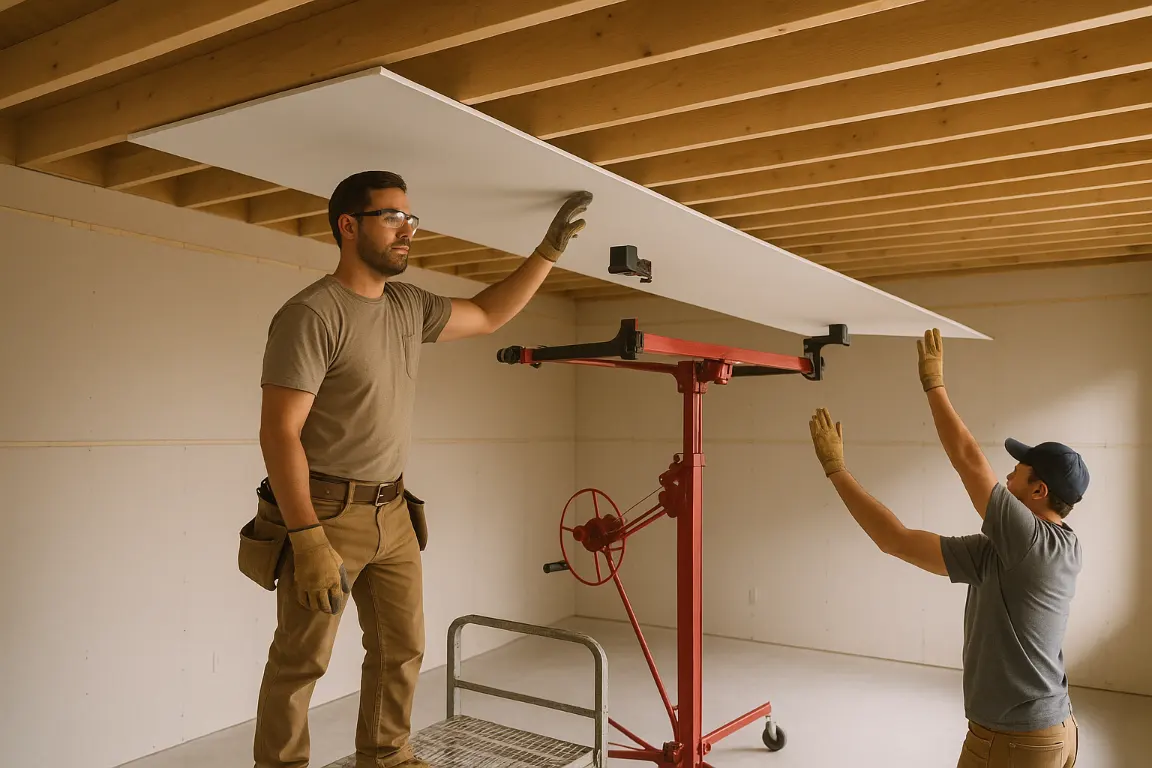
Ceiling work is where an otherwise straightforward drywall installation becomes a genuine safety consideration. A standard drywall panel is heavy, unwieldy, and difficult to control overhead; attempting to hang drywall alone can strain your back, damage the board, or create an avoidable fall hazard. At MrWalls Drywall & Painting, we treat preparation as an essential step in the work, not an optional extra for a diy project at home.
Before you install drywall, confirm that the framing is sound, evenly spaced, and clear of loose insulation, exposed wiring, or plumbing that could be punctured. Mark joist locations on the surrounding walls before the ceiling is covered, then use a drywall lift or a reliable second set of hands to raise drywall sheets steadily into place. Keep the room open, well lit, and free of cords, tools, offcuts, and products that could create a trip risk while your attention is overhead. Protect the floor, and plan each corner and cut before lifting the panel.
Position gypsum board panels perpendicular to the ceiling joists whenever practical, bringing factory edges together snugly without forcing them. Once each drywall panel is fully supported, drive drywall screws just below the paper surface, not deep enough to break it, at appropriate intervals along every joist. Use the correct drill bit and screws for the building conditions. Overdriven fasteners lose holding power, can prevent damage from being identified early, and often lead to sagging or popped screw heads after drywall finishing begins.
Wear eye protection against falling dust and debris, use a stable platform rather than improvised furniture, and stop if a panel will not sit flat. Careful lifting, secure fastening, and a deliberate pace create a cleaner finish and a safer workspace from start to finish. With the ceiling properly installed, mud drywall, tape, and taping work can proceed with confidence for a polished gypsum ceiling.
A refined wall finish begins long before tape and joint compound; it starts with the precision of how you hang drywall. Before lifting a drywall panel, inspect the framing for bowed studs, proud nail heads, loose blocking, and uneven corners. A long straightedge and the right tools make this essential step efficient, exposing irregularities that might otherwise telegraph through paint. In any home or commercial building, MrWalls Drywall & Painting recommends using full drywall sheets wherever possible and placing them horizontally on standard-height walls to minimize horizontal joints and create a quieter, more continuous surface.
Leave a small gap at the floor rather than pressing gypsum board tight against concrete or subflooring. This deliberate detail helps prevent damage from minor moisture exposure while keeping the lower board edge discreetly concealed behind baseboard. At ceilings, fit each drywall panel snugly without crushing the gypsum core. Drive drywall screws just below the paper face, deep enough to form a clean dimple but never so deep that the paper tears and loses its holding strength. The right screws, products, and driver bit make this small yet consequential step more consistent.
Stagger vertical seams from one course to the next, and never align a joint with the edge of a door or window opening, where movement can invite cracks. Instead, run a continuous board across the opening and cut it out afterward. At every corner, plan the layout so one board extends beyond the framing while the adjoining board butts neatly into it. This method creates a firmer, straighter corner and gives drywall finishing crews a dependable edge for taping. Whether you install drywall in a single room or oversee a larger project, careful hanging drywall establishes the standard for every phase that follows. Even experienced diy renovators who mud drywall understand that thoughtful drywall installation delivers flatter walls, cleaner tape lines, and a finish that disappears beneath refined paint.
Clean cuts and precisely set drywall screws create the foundation for a refined finish. Before you cut a drywall panel or gypsum board, measure each opening, corner, floor transition, and room detail with care; thoughtful layout is the essential first step in professional drywall installation. Use sharp tools, the correct bit, and controlled pressure when trimming drywall sheets to prevent damage to the face paper and gypsum core. Whether you hang drywall for a diy home update or install drywall as part of a larger building project, secure every board and panel without driving screws too deeply. Proper hanging drywall leaves an even surface for tape, taping, and drywall finishing, making it easier to mud drywall and achieve a seamless final finish with quality products.
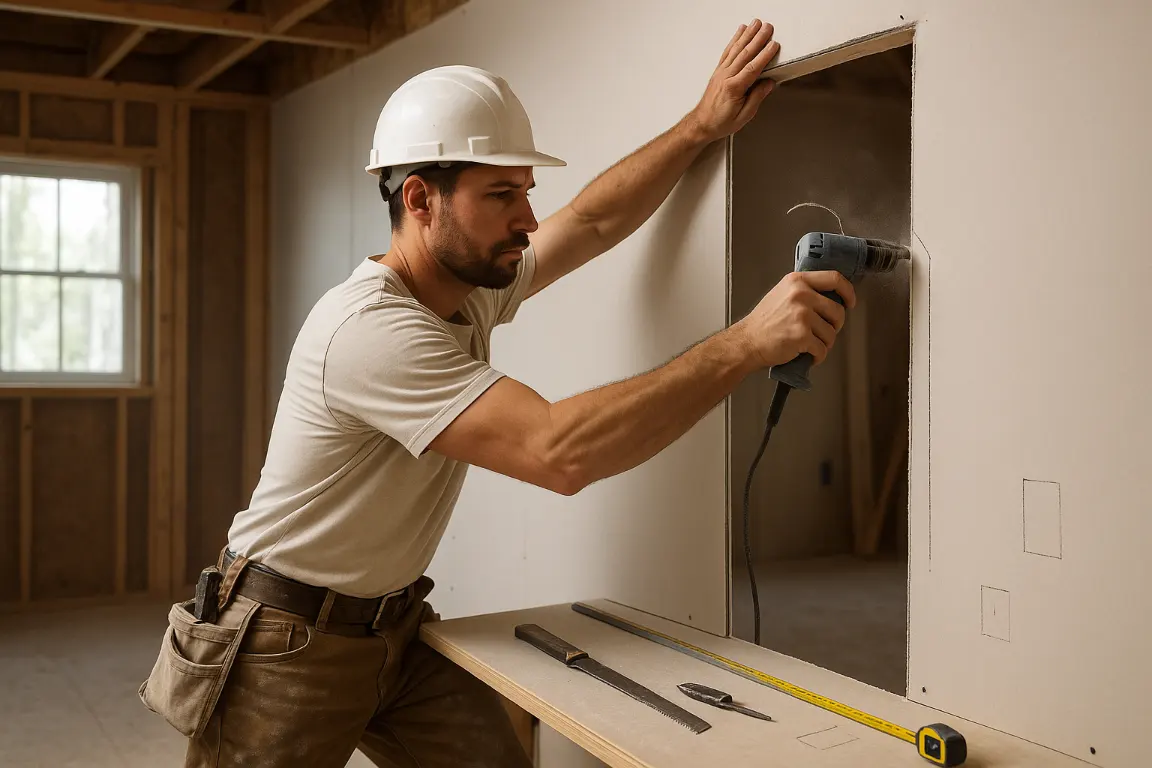
Plan every cut before lifting a drywall panel into place. For doors and windows, MrWalls Drywall & Painting recommends hanging full drywall sheets across the opening whenever practical, then cutting the opening out once the panel is securely fastened. This method delivers stronger, cleaner edges than piecing smaller sections around the framing, where joints can later crack during drywall finishing.
Select tools with purpose: use a drywall saw for small, controlled openings; a rotary cutout tool with the proper bit for door and window openings; and a utility knife with a straightedge for long, precise lines. Mark electrical boxes, plumbing penetrations, vents, and recessed fixtures from two fixed reference points. Cut openings only slightly oversized when clearance requires it, as wide gaps are harder to tape, mud drywall, and finish with a clean, professional appearance.
Support the gypsum board while cutting, and keep blades sharp to prevent damage to the paper facing. Before fastening with drywall screws, dry-fit each board and confirm that utility openings align without forcing the drywall into place. Whether you hang drywall for a diy home project or a larger building renovation, careful hanging drywall is an essential step in a refined drywall installation: install drywall square to the floor, protect every corner, and reserve the right products, screws, and taping tools for a durable finish in every room.
Before drywall finishing begins, every room merits a deliberate, room-by-room inspection. At MrWalls Drywall & Painting, we evaluate the details that determine whether a finished wall appears seamless beneath paint: board alignment, drywall panel placement, fastener depth, corner bead, butt joints, cut edges, and transitions at doors, windows, ceilings, and floor lines. Even an exceptional finish relies on the integrity of the surface below.
Properly set screws sit just below the paper face without breaking it. Seams require consistent gaps, secure backing, and precise tape placement, while outside corners should remain straight, firmly attached, and free of dents. We also check for moisture staining, movement cracks, or soft gypsum board, especially following water damage, before applying compound. Resolving these concerns first helps prevent damage and ensures a cosmetic repair does not become a recurring issue.
That inspection establishes the right approach to taping and coating. Some surfaces need only minor correction before we tape; others call for added backing, patch work, or replacement sections to restore a stable plane. Whether the original drywall installation involved hanging drywall in a new building or a small home repair, each step shapes the plan: the number of coats, the width of the feathered edge, and the level of finish best suited to the room’s lighting and paint sheen.
To mud drywall well is not simply to fill seams. It is a disciplined process of embedding tape, building thin coats, sanding selectively with the proper tools, and maintaining crisp, level lines across each drywall sheet. diy products may address a small bit of damage, but to install drywall, or hang drywall and finish a gypsum panel to a high standard, requires practiced judgment. With the installation assessed first, the final finish provides the durability and polished appearance homeowners expect.
Choosing a contractor for drywall installation in Springfield, Massachusetts should begin with a detailed conversation about every room, the condition of the building, the project schedule, and the level of finish you expect. A qualified team will clearly explain how it will hang drywall, position drywall sheets, secure each drywall panel with drywall screws, and treat every gypsum board seam with care. It should also protect the floor, corner, and surrounding surfaces to prevent damage. From the first cut, screw, and driver bit to taping, tape application, mud drywall, and drywall finishing, the work should follow a disciplined step-by-step process, not a diy shortcut assembled with mismatched tools, products, or panel work. Whether you need to install drywall for a whole-home renovation or a targeted repair, look for a contractor with a precise plan for hanging drywall, handling gypsum and board materials, and delivering a paint-ready finish that stands up to close inspection.
Before requesting estimates, define the work with practical precision: identify which walls or ceilings require drywall installation, which areas need new gypsum board or drywall sheets, and whether any existing drywall panel or panel must be removed. Clarify whether the crew will hang drywall, install drywall, or address insulation, framing repairs, and water-damage remediation before work begins. Record the dimensions, purpose, and lighting of each room; a formal living area with strong natural light demands a more exacting finish than a utility room. In an older Springfield building, a careful contractor should assess uneven framing, earlier patchwork, access limitations, and the condition of the floor before committing to a price or timeline. This is not a diy detail to leave to chance: the right tools, products, cut lines, board placement, drywall screws, and corner treatment shape the finished surface and help prevent damage throughout the home.
The next step is to agree on the finish level, including the standard of drywall finishing suited to the intended paint sheen and lighting conditions. Ask how joints, fasteners, screws, corners, and repairs will be taped, whether tape and taping are included, and how many coats will be applied to mud drywall before sanding. Confirm whether texture matching, popcorn ceiling removal, repainting, or specialty gypsum repairs belong in the scope, and put every detail in writing. Finally, establish how the crew will contain dust, protect the floor and furnishings, remove debris, and manage daily cleanup. A detailed scope gives MrWalls Drywall & Painting and any competing contractor a fair foundation for an accurate, comparable proposal, whether the work involves hanging drywall in one room or a full-home renovation, down to the last bit of compound.
DIY can work for a small, simple patch if you have the tools and time to practice. Larger repairs, ceilings, water damage, textured surfaces, and rooms where the repair must blend with existing walls often benefit from professional installation and finishing.
Use moisture-resistant gypsum board in humid areas such as bathrooms, laundry rooms, kitchens, and some below-grade spaces. It helps handle humidity, but leaks, ventilation problems, and shower waterproofing must still be addressed separately.
Replacement may be needed when drywall is soft, swollen, stained, mold-affected, crumbling, or damaged by prolonged moisture. The source of the water must be repaired, and framing and insulation should be completely dry and structurally sound before new drywall is installed.
Measure each wall and ceiling separately, then calculate total square footage. Account for windows, doors, closets, angled ceilings, corners, and offcuts. A panel layout helps determine sheet sizes, seam locations, and the extra material needed for efficient installation.
Framing should be checked and corrected before panels are hung. Warped studs, unsupported edges, loose blocking, protruding fasteners, and uneven planes can cause visible waves, cracked joints, popped screws, and poor alignment after finishing.
Ceiling drywall is heavy and difficult to control overhead, so working alone is not recommended. Use a drywall lift or a dependable helper, confirm joist locations, keep the area clear, wear eye protection, and use a stable work platform.
Visible seams can result from uneven joint compound, insufficient feathering, poor sanding, shifting framing, or unsuitable lighting that exposes surface imperfections. Screw heads may show when fasteners are overdriven, underdriven, or not properly covered during finishing.
Fire-rated gypsum board is often required for specific assemblies, including many walls or ceilings between an attached garage and the home. Requirements vary by location and building design, so confirm applicable codes and install the complete rated assembly correctly.
Drywall concerns are seldom merely cosmetic. A softened area after a leak, a ceiling stain that continues to spread, cracked seams, or dated popcorn texture can compromise the comfort, value, and finished character of a room. MrWalls Drywall & Painting provides considered solutions for every home, from precise repair and water-damage restoration to popcorn ceiling removal and full drywall installation for a remodel.
What we address: water-related damage, ceiling stains, cracked seams, popcorn texture, and remodel-ready wall preparation, along with drywall finishing that restores a refined, paint-ready finish.
Our process begins with what lies behind the surface. Before addressing drywall, we assess moisture, movement, insulation, and prior work that could compromise the result or prevent damage from returning. After a plumbing leak or roof issue, that may involve removing affected gypsum, gypsum board, or drywall panel materials; protecting the floor and surrounding area; and selecting the appropriate products before new drywall sheets are installed.
For renovations, we install drywall with crisp lines at every opening, corner, ceiling, and transition to an existing wall. Whether the work involves hanging drywall, guidance on how to hang drywall, or a decision to install drywall as part of a larger building project, the essentials remain exacting: properly placed drywall screws and screws, disciplined tape and taping, clean joints, smooth sanding, and a consistent finish. Our team brings specialized tools, the right cut for each panel or board, and the experience to manage every step beyond a typical diy approach, from mud drywall application to final drywall finishing, with precision down to the smallest bit.
From a single damaged section to a more extensive restoration, we deliver dependable craftsmanship and clear communication throughout the process. The goal is simple: drywall that feels solid, looks seamless, and gives the entire room a polished, lasting finish.